Disclosure: We only endorse products and services that we’ve personally used or come highly recommended by trusted sources. As an Amazon Associate I earn from qualifying purchases. If you grab anything we mention, we may get a small commission. However, there’s not extra cost to you.
The pandemic caused everyone to pivot in one way or another. It has also impacted podcasters in a huge way because it is now difficult or impossible to record in person. But this has created an opportunity that many podcasters are seizing upon. Several of our podcasts here at Podcircle have actually increased production because it just got a lot EASIER to record podcasts. There are advantages to recording in the same room, yes — but it isn’t a necessity. There are actually benefits to recording remotely. And there’s never been more proof of that than right now.
You can still record a really high quality podcast. And the not-so-secret weapon is Zoom. Pair Zoom with Quicktime (or Audacity for PC) and you’ve got a dynamite duo powering your remote podcast recordings.
You’ve certainly heard of Zoom by now and you’ve probably used it. It’s the popular video conferencing platform everyone seems to be using these days. But it’s also an great tool for podcasters, whether you’re a solo podcaster interviewing guests or you’ve got a co-host recording remotely.
Important Note: Zoom is not the only way to record remote podcasts. And it’s not even the best way (in our opinion). We encourage our clients to use Riverside.fm for remote interviews because it records high quality audio and video that doesn’t glitch out when your internet does. However, we also recognize the ubiquitousness of Zoom as a solution for recording remote conversations. So, in this article we’re going to show you how to SUPER CHARGE it for optimal podcast performance.
I’m going to give you all of my tips to remote recording with Zoom. But first, let’s talk about USB Microphones.
USB Microphones
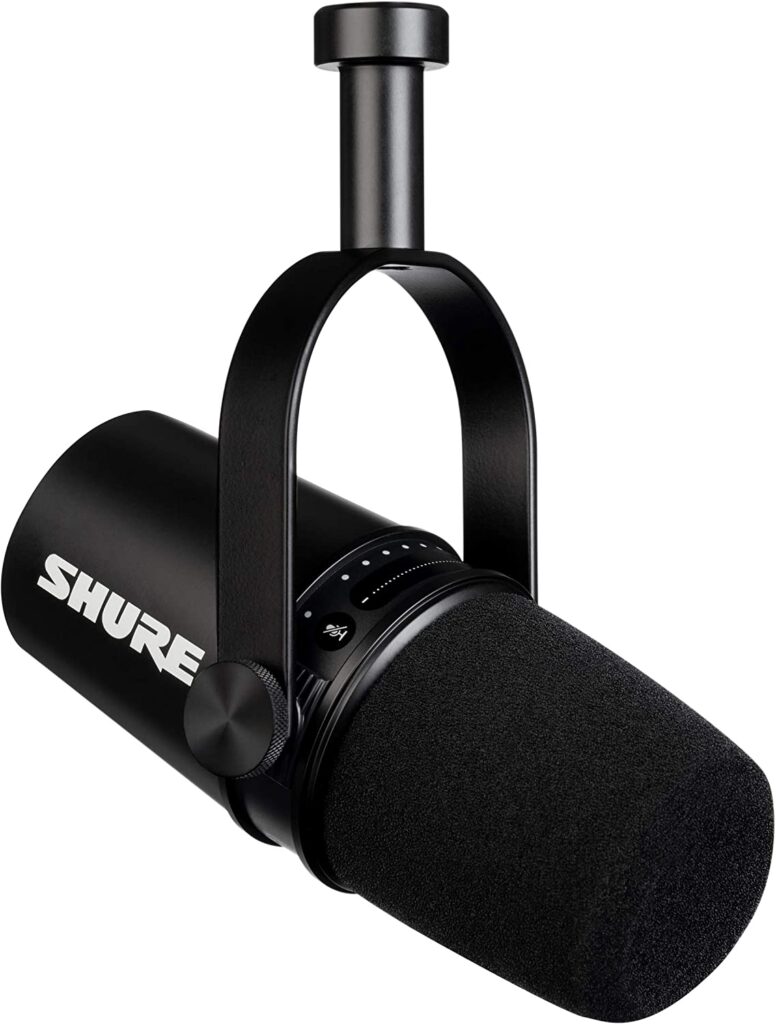
The Shure MV7 USB microphone is easily my favorite USB microphone. I’m a huge fan because they’re affordable, they couldn’t be easier to use and they sound great. They’re also perfect for when you only need to record yourself.
You don’t have to use a USB microphone with Zoom — any other professional microphone will do the trick. But as the podcast host, you never want to record using the internal mic on your computer. Like, ever.
So invest in a great microphone that’s easy to use and is going to last. You don’t have to spend a lot of money. In fact, my post 5 Tips for Recording High Quality Podcasts will tell you everything you need to know about this.
Alright! Let’s talk Zoom.
Need personalized help with your podcast? Schedule a free call with me today!

One of my favorite things about Zoom is that it makes scheduling really easy. Set a date and time for the interview in Zoom and then invite your guest or co-host. They get a calendar invite and a link to the Zoom call. Easy!
Let’s go over a few tips to optimize Zoom for your podcast recording.
Optimizing Zoom For Podcast Recordings
Download the Zoom App onto your computer. You can use the web-based version, but I like the stability of the desktop application.
There is a setting that really unlocks Zoom for podcasters.
Go to your Zoom preferences > click the Recording tab > choose a recording location (I recommend your desktop) > select ‘record a separate audio file for each participant’.
Oh my gosh, it felt good to type that! Zoom can record a separate audio file for you, your co-host, guest… EVERYONE on the podcast. This is a game changer and one of the key features that takes Zoom to another level for podcasters.
Why is this great? Having everyone’s audio on a separate track means that you can treat everyone individually. Say your guest is really soft and you are really loud — now you can tweak that because you’re each on separate audio tracks. But if everyone’s audio is recorded to one track (the default setting), there isn’t much you can do. So, it gives you or your editor an incredible amount of flexibility to create a podcast that sounds amazing.
Quicktime For Higher Quality + Backup

Note: Mac Users, Quicktime comes on your Mac. PC users should download Audacity (free). Here’s how to use Audacity to record your podcast. But keep reading, this post still applies to you!
If you REALLY want to take your podcast quality to the next level, do this:
Record yourself and your guest or co-host locally to your computers with Quicktime. Why? Because this is the audio you’ll actually use for your podcast.
“But wait… we’re already recording the Zoom call. Why wouldn’t we use that audio?”
Well, you can. But Zoom’s audio isn’t great because it’s recorded over the internet. And we can do better for our listeners. Plus (and this is a huge plus), it serves as a backup recording.
All you have to do is open Quicktime (Spotlight it if you can’t find it) > click File > New Audio Recording > click the down arrow beside the record button and select your microphone > Click the red record button. Now you’re recording audio straight from your microphone to your computer in high quality.
When you are finished recording, click the record button again to stop the recording. File > Save > Name it. Then IMMEDIATELY have your guest(s) send you their file.
That’s right. You’ll have them record on their end, too. Why? Because it’ll sound better and it’s a backup if anything goes wrong with the Zoom recording.
You always want a backup.
The problem with Zoom’s audio recording is that the quality isn’t great. And whenever possible, you want to use the high quality audio you recorded straight into Quicktime.
Important Note: Zoom is not the only way to record remote podcasts. And it’s not even the best way (in our opinion). We encourage our clients to use Riverside.fm for remote interviews because it records high quality audio and video that doesn’t glitch out when your internet does. However, we also recognize the ubiquitousness of Zoom as a solution for recording remote conversations. So, in this article we’re going to show you how to SUPER CHARGE it for optimal podcast performance.
Need personalized help with your podcast? Schedule a free call with me today!
Recording Checklist
So before you hit record on your podcast episode, here are 10 essential things you should do FIRST. Bookmark this page or print it out, but follow these 10 steps for remote podcast success.
- Is there an ethernet connection available? If yes, have everyone plug in. If not, make sure everyone has access to a quality wireless internet connection.
- Start your Zoom call.
- In Zoom, select your microphone — find the up arrow beside the microphone in the lower left hand corner. Also select your output (HEADPHONES!)
- Headphones! Make sure you and your guest are wearing headphones so that your audio isn’t feeding back into each others microphones. << If that doesn’t make sense, just trust me. It’ll make your recording sound much cleaner and easier to edit.
- Silence notifications (phones, etc).
- Everyone open Quicktime (or Audacity for PC users), select your microphones and press record.
- Host: Press record on the Zoom call
- Clap!! Before the interview begins, do a 3-2-1-CLAP. This is for whoever is editing your podcast. It’s a visual marker in the audio waveform that will help them sync up everyone’s audio.
- When you’re finished, have everyone stop their Quicktime (or Audacity) recordings and send them to you (or the podcast editor) IMMEDIATELY.
- Stop the Zoom recording. When you end the meeting, your Zoom recordings will be processed for you download (if you recorded to the cloud) or they will be downloaded straight to your computer.
That’s it! If you have a question or suggestion, leave a comment below or reach out!

Before you go! Download our Complete Podcast Starter Kit.
It includes:
✅ Podcircle’s Essential Equipment Guide
✅ The Ultimate Podcast Launch Checklist
✅ Content Calendar Template formatted for Google Sheets
✅ Remote Interview Preparation Pack
✅ 8 Tips to Improve Your Interviews
✅ Three Steps to Writing a Compelling Podcast Show Description


